Install LAMP Stack on Ubuntu 20.04
Install LAMP Stack on Ubuntu 20.04
LAMP stack is a software stack that includes: Linux as a primary Operating system, Apache as a Web-Server, MySQL as a database, and PHP as a scripting language.
LAMP stack used to create an environment for Developing/Running PHP web applications and it’s one of the most popular software stacks out there. In this tutorial, we are going to learn how to install each one of the softwares of the LAMP Stack on the CentOS 8 machine.
Install Apache
Apache is one of the most popular open-source web server software out there so we are going to install the Apache webserver with the following command:
apt install apache2After the installation process is completed you can start the Apache service with:
systemctl start apache2And you can make the service run at the system startup using:
systemctl enable apache2Configuring Apache
Apache is a very flexible software that you can change a lot of things with its configuration and make it do exactly what you want, here we are going to show you the configuration file and some of its default values that can help you start a simple LAMP stack environment.
You can find Apache main configuration file in the following path:
/etc/apache2/apache2.confYou can open the configuration file with any text editor that suits you, we are going to use “vi”:
vi /etc/apache2/apache2.confSome of the important directives that could be important to you for start are:
Listen 80 > determines which port should Apache listen to which by default set to HTTP (80)

User & Group > by default its set to "apache" but if you want Apache to run with other users for some reason you can change it from here easily

DocumentRoot > This is the directory which you will serve your Website or Web-application or anything else
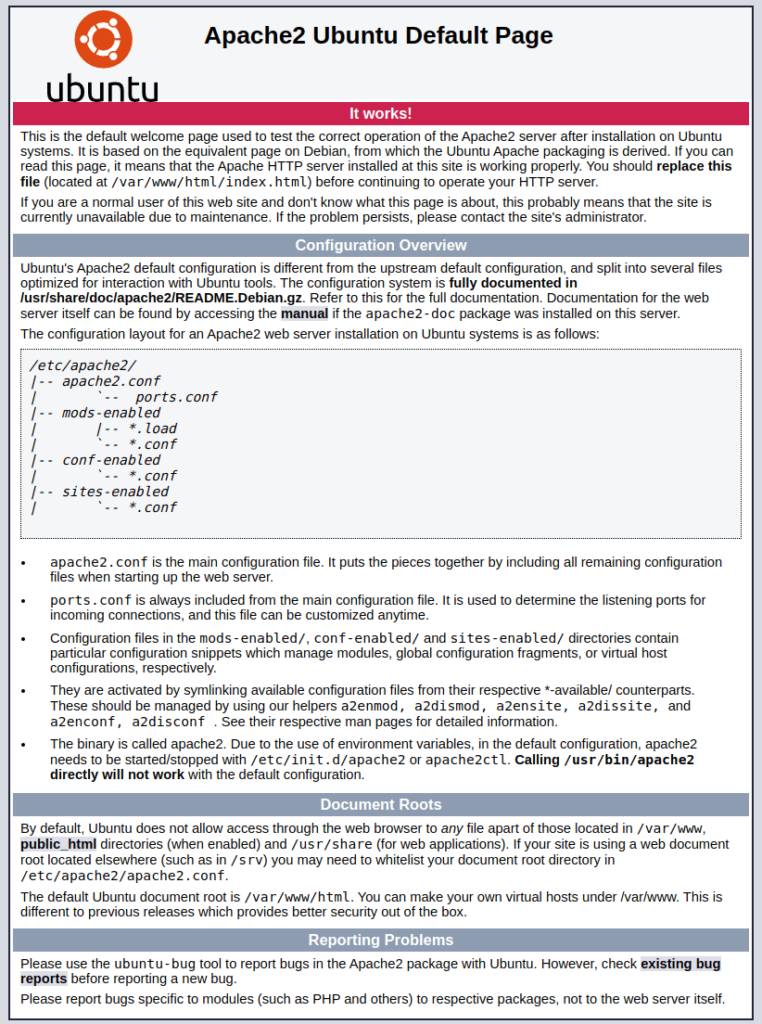
Now that you are familiar with some of the Configuration and you started Apache service you can verify that it’s working correctly by seeing your domain or your public IP address through a browser, if You’ve done everything correctly you will see a page like a picture below:
Install MySQL
MySQL is an open-source relational database management system, which is the most common database management system at the time of writing this article, MySQL is freely available through almost all of the software repositories and as you can find out from the name it uses the SQL (Structured Query Language).
Install MySQL with the following command:
apt install mysql-serverYou can start and enable MySQL service using:
systemctl start mysqlsystemctl enable mysqlThere is a useful tool that you have when you install MySQL is “mysql_secure_installation” which can be a very huge help for beginner users, it can help you do some initial ye important configuration easily using a wizard mode, you can start the process by typing:
mysql_secure_installationInstall PHP
PHP is a general-purpose scripting language which mostly used in the development of Web-Applications.
We are going install PHP 7.4 which is the latest stable version:
apt install phpAfter the installation, you need to restart the “apache2” service because the module that handles PHP in Apache is configured automatically but it needs a restart after the installation of PHP.
systemctl restart apache2If you want to test that everything is working fine and your Apache can handle PHP you can create an “info.php” file in the document root:
vi /var/www/htmlJust copy and paste the following lines in the file then save and exit:
<?php
phpinfo();
?>
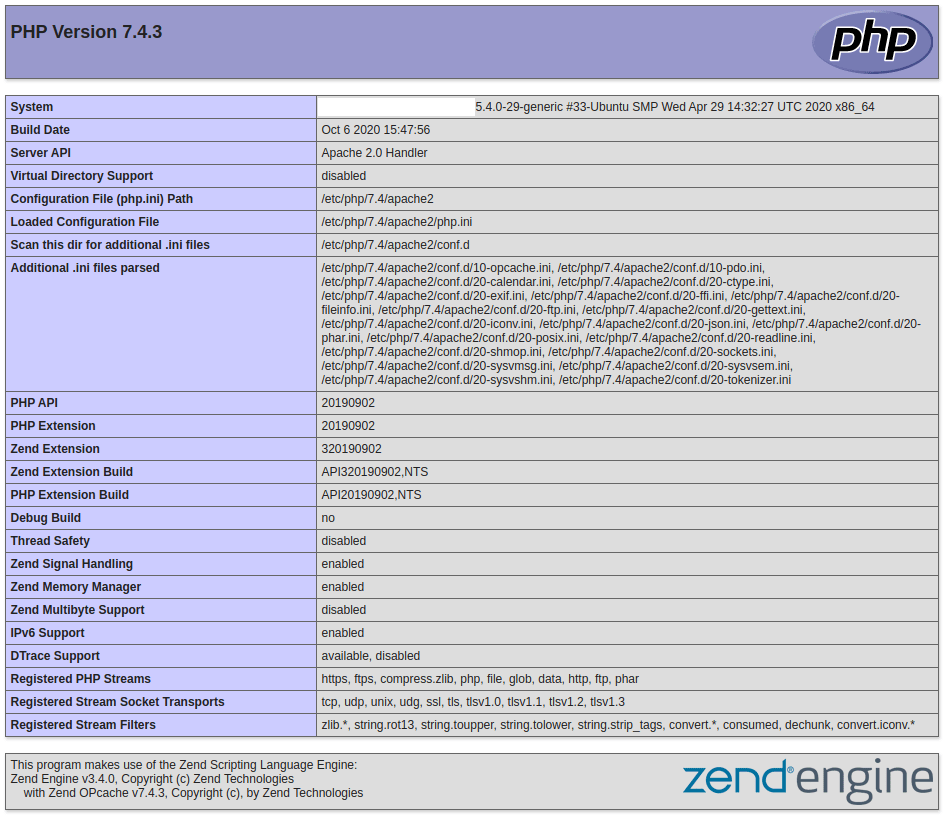
Now open your browser and enter your domain/IP address along with “/info.php”
http://YOUR_DOMAIN_OR_IP_ADDRESS/info.php
If you see something like the picture below then everything is OK and you are good to go.