Backup and restore GPG keys on Linux
Introduction
The issue of privacy is becoming more and more controversial. Users of Linux can encrypt files with public-key cryptography by using the gpg command. If you were to lose your encryption keys, this would be a disastrous situation. This is how you may support their claims.
OpenPGP and GNU Privacy Guard
One benefit of electronic files over paper hard copies is the ability to encrypt them so that only authorized users may access them. It won’t matter if they end up in the wrong hands. The contents of the files are only accessible to you and the intended recipient.
Public-key encryption is a type of encryption that is described in the OpenPGP standard. The command-line utility gpg, which can encrypt and decode data following the standard, results from the GNU Privacy Guard implementation.
The specification describes a public-key encryption system. Despite the term “public-key,” there are two keys involved. There are private and public keys for each individual. As the term implies, private keys are never disclosed or shared with anybody else. Sharing public keys is secure. For the scheme to function, public keys must be shared.
The recipient’s public key and the sender’s private key are utilized throughout a file’s encryption process. The addressee can then receive the file. To decrypt the file, they employ both their private key and the sender’s public key.
A specific identity is associated with a matching pair of generated public and private keys. Even if you don’t share sensitive information with others, you can use them on your computer to give private documents an added layer of security.
World-class algorithms and cryptographic operations are used in encryption. You cannot access encrypted files without the proper public and private keys. Additionally, if you misplace your keys, you are also responsible. Making new keys won’t be of any use. The keys used in the encryption process are required to decrypt your data.
Having a backup of your keys and understanding how to restore them is essential. How to complete these activities is shown below.
The .gnupg Directory
Your home directory contains a directory called “.gnupg” where your keys are kept. The public keys of anyone who has supplied you with encrypted files will be kept in this Directory. Their public keys are added to an indexed database file in that location once you import them.
Of course, nothing in this Directory is kept in plain text. A passphrase is requested when you generate your GPG keys. I hope you can recall what that passphrase is. You will require it. Without it, it is impossible to decode any entries in the “.gnugp” Directory.
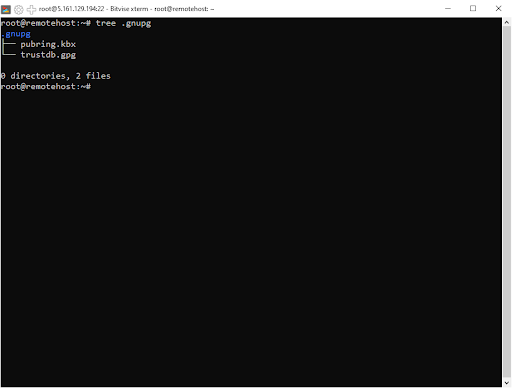
We may observe this hierarchy of subdirectories and files if we examine the Directory using the tree utility. If it’s not already on your machine, you can find the tree in your distribution’s repository.
tree .gnupg
The directory tree’s contents are as follows:
- openpgp-revocs.d: Your certificate of revocation is located in this subdirectory. If your private key is ever compromised or made public, you’ll require this. You can retire your old keys and adopt new ones using your revocation certificate.
- private-keys-v1.d: Your private keys are stored in this subdirectory.
- pubring.kbx: a protected file. It includes your public key as well as some associated metadata.
- pubring.kbx~: Pubring.kbx has a backup copy here. It is updated right before “pubring.kbx” updates.
- trustdb.gpg: This preserves the trust connections you’ve built between your keys and any other people’s accepted public keys.
You want to regularly and frequently back up your home directory, including any hidden files and folders. That will automatically back up the “.gnupg” Directory.
However, you could feel that your GPG keys are significant enough to merit their regular backup, or you might want to transfer your keys from your desktop to your laptop to have them on both devices. After all, you remain the same on both machines.
Picking the Right GPG Keys for Backup
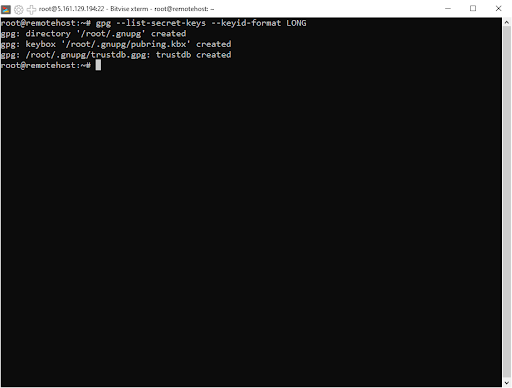
The keys in your GPG system can be revealed by inquiring with gpg. We will use the “—list-secret-keys” options and the” —keyid-format” LONG options.
gpg --list-secret-keys --keyid-format LONG
We’re told that GPG is looking inside the “/root/.gnupg/ pubring.kbx”
Nothing that shows up on the screen represents your actual secret key.
The “sec” (secret) line displays “[SC],” the key ID, the date the key was created, and the number of bits in the encryption (4096 in this example). The letters “S” and “C” indicate that the key can be used for digital signatures and certification.
The key fingerprint is on the following line.
The ID of the key’s owner is stored in the “uid” line.
The secret subkey, the creation date, and “E” are displayed on the “ssb” line. The “E” denotes that it can be encrypted.
They will also be listed if you have produced multiple key pairs for usage with various identities. For this user, there is just one key pair to backup. The backup will contain all public keys that the owner of this key has obtained and decided to trust.
Back-Up GPG Key(s)
We can request that gpg back up the keys connected with a particular identity, or we can request that it back up all of the keys associated with all identities. We will copy the private key, secret key, and trust database file.
Utilize the –export option to create a backup copy of the public keys. In addition to that, we are going to use the backup options for the —export-options command. This guarantees that all GPG-specific metadata is included, making it possible for the files to be imported correctly on a different machine.
Using the ” –output ” option, we will specify a file to be used as the output. If we did not do it, the output would have been directed to the window of the terminal.
gpg --export --export-options backup --output public.gpgIf you only intended to back up the keys for a single identity, then you should provide the email address that is associated with the keys to the command line. If you want to make a copy of the keys, you will need to do this first. If you cannot recall the email address connected with it, you should use the “—list-secret-keys” option, which was discussed earlier.
gpg --export --export-options backup --output public.gpg [email protected]To back up our private keys, we need to use the “—export-secret-keys” option instead of the” —export” option. Make sure that you save this to a file that isn’t the default one.
gpg --export-secret-keys --export-options backup --output private.gpgGPG will ask you to authenticate yourself before proceeding with this transaction because this is your private key.
To back up your trust relationships, we need to export the settings from your “trustdb.gpg” file. The output is saved to a file called “trust.gpg.” It’s a text document. Cat can be used to watch it.
gpg --export-ownertrust > trust.gpgcat trust.gpgThe three files we produced are shown below.
ls -hl *.gpgThese will be transferred to a different computer and restored. By doing so, we can use our current GPG keys and establish our identity on that device.
If you are not relocating the keys to a different computer and are only backing them up to ensure their safety, make a copy of the keys and keep them securely. Your public key is already public, therefore, there is no risk even if they are intercepted. Additionally, your private key cannot be recovered if you forget your passphrase. But even so, keep your backups private and secure.
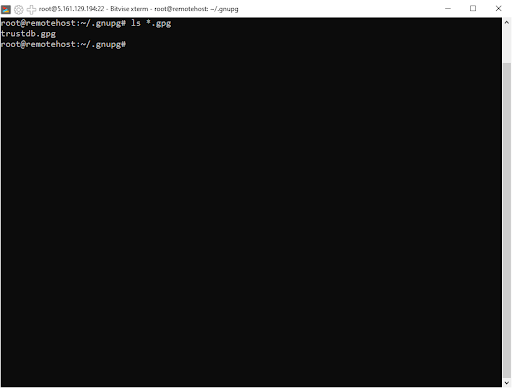
ls *.gpg
Restore GPG key(s)
We must use the “–import” option to import our keys.
gpg --import public.gpgAs the key is imported, its details are shown. Additionally, the “trustdb.gpg” file is produced for us. The private key can be imported just as easily. Once more, we employ the –import option.
gpg --import private.gpgWe ask you to input the passcode.
Enter it into the “Password” field, then press the “Tab” key and “Enter.”
The information about the imported keys is presented. We just have one key in our situation.
Type: to import our trust database
gpg --import-ownertrust trust.gpgWe can double-check that everything was properly imported using the —list-secret-keys option.
gpg --list-secret-keys --keyid-format LONGConclusion
As an extra backup solution, we learned in this article how to export our GPG secret key in a format that can be printed on paper. We showed how to do it with the gpg software and paper key, a tool that extracts only the secret information section of the exported material. Finally, we looked at how to make several QR Codes from the exported key content.
Back up your GPG keys to ensure their security. Make sure you know how to transfer your keys to the new computer in case of a computer disaster or simply an upgrade to a newer model.