Creating Notification Roles
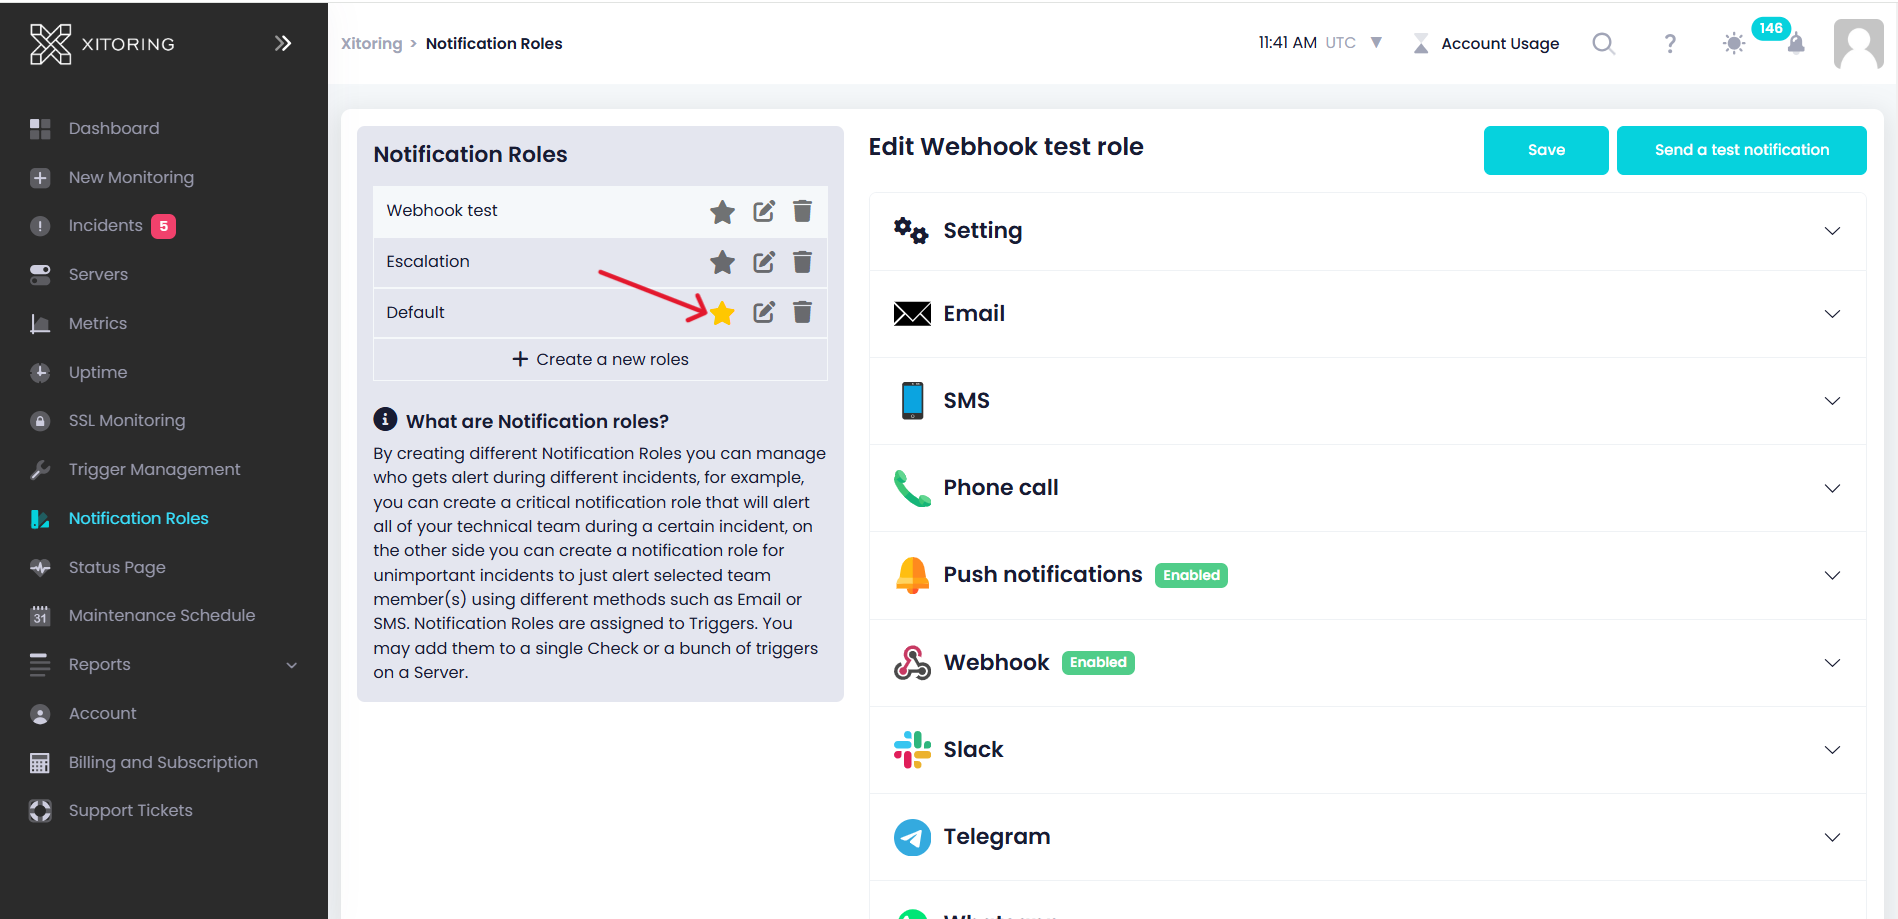
You just need to enter the name for it and click on save. then you can click on that Notification role from the list and do some configurations, from the Recipients section you can choose from your already added teammates, and also you can add Custom Recipients and enter your name. email, and mobile for them.
Choose a name, and create a new notification role. Now you can configure as many channels as you wish, and also Repeat incidents if you wish.
Repeated incidents will clearly show a [REPEATED] in the incident message to shows its not a new incident. Repeated incidents will be pushed to all configured channels if the problem is on going.
Test Notification Roles
After creating a Notification Role you can send a test notification, this will create a dummy incident notification and send it to that specific notification contact option so that you can be sure of your notification role setup and be confident that you'll get the notifications as soon as an incident happens. Test notifications will be sent to all configured channels.
Favorite Notification Roles

Favorite Notification roles are automatically selected when creating new Uptime check, or any other type of triggers. It can be changed anytime, and it won't affect current triggers
Using Notification Roles
Notification Roles are the core of the notification system, you can access them from the sidebar menu. On the Notification Roles page, you can see a list of your already created notification role, you can also create different Notification roles for different triggers.
Assign Notification Roles to Triggers
On each trigger, you can set your notifications to roll individually. Xitoring allows one or more notification roles per trigger.
Use Notification Roles on new Servers
When adding a new Server, you can select your desired notification role, so that all triggers will be associated with the selected notification role.
Use Notification Roles on new Uptime Checks
When adding a new Uptime, you can select your desired notification role, so that all triggers will be associated with the selected notification role.