Xitoring Document
Home
FAQ
Support
Register
Home
FAQ
Support
Register
  • Xitoring

    • Introduction
    • Release Notes
    • Xitoring Release Notes
    • Linux Xitogent Release Notes
    • Windows Xitogent Release Notes
    • Xitoring Mobile App Release Notes
    • Account Management
    • API Access & Automation
    • Team Management & Collaboration
    • Billing & Subscription Management
  • Getting Started

    • Getting Started with Xitoring
    • Workflows & Guides
    • Monitor Your First Server
    • Import / Migration
    • Migrate from UptimeRobot to Xitoring
    • Migrate from Pingdom to Xitoring
    • Migrate from Uptime.com to Xitoring
    • Migrate from BetterStack to Xitoring
  • Help & Support

    • FAQ & Troubleshooting
    • Glossary
  • Server Monitoring

    • Server Monitoring
    • Graphs
    • Live Statistics
    • Monitor Services
    • Auto-Triggers
  • Xitogent on Linux

    • Install Xitogent on Linux
    • Update Xitogent on Linux
    • Uninstall Xitogent on Linux
  • Xitogent on Windows

    • Install Xitogent on Windows
    • Uninstall Xitogent on Windows
    • Xitogent Service
    • Update Xitogent on Windows
    • Disk Performance (I/O)
  • Xitogent on Azure

    • Xitogent on Azure
    • Monitor Azure Linux VM
    • Monitor Azure Windows VM
  • Xitogent CLI

    • Xitogent CLI
    • Xitogent Pause/Unpause
    • Xitogent Status
    • Xitogent debug
    • Xitogent Diagnosis
    • Which data we collect
  • Xitoring CLI

    • Xitoring CLI
  • Uptime Monitoring

    • What is Uptime Monitoring
    • Monitoring Nodes (Geographic Locations)
    • What is Check
    • Auto-Discovery
    • Auto Fault Tolerance
    • Heartbeat Check
    • Ping Check
    • HTTP(S) Check
    • DNS Check
    • FTP Check
    • SMTP Check
    • IMAP Check
    • POP3 Check
    • TCP Check
    • UDP Check
  • SSL Monitoring

    • SSL Monitoring
  • Incidents

    • Incidents
    • Incident's Root Cause
    • Incidents Notification
    • Incident Notes
    • Resolving Incidents Manually
    • Incident Policy
  • Maintenance Schedule

    • Maintenance Schedule
  • Email Reports

    • Email Reports
  • Integrations

    • Integrations
    • Apache Integration
    • CoreDNS Integration
    • CouchDB Integration
    • Disk Health Integration
    • Docker Integration
    • Dovecot Integration
    • Exim Integration
    • HAProxy Integration
    • IIS Integration
    • InfluxDB Integration
    • Kafka Integration
    • KeyDB Integration
    • LiteSpeed Integration
    • MongoDB Integration
    • MySQL Integration
    • Netstat Integration
    • Nginx Integration
    • OpenLiteSpeed Integration
    • OpenVPN Integration
    • PHP-FPM Integration
    • Postfix Integration
    • PostgreSQL Integration
    • RabbitMQ integration
    • Redis Integration
    • MS SQL Server Integration
    • Supervisor Integration
    • Varnish Integration
    • Wireguard Integration
  • Notifications

    • Notifications
    • Creating Notification Roles
    • Email Integration
    • Mobile Push Notifications
    • SMS Integration
    • Phone call Integration
    • Webhook Integration
    • Integration for Slack
    • Telegram Integration
    • WhatsApp Integration
    • Mattermost Integration
    • Discord Integration
    • Google Chat Integration
    • Microsoft Teams Integration
    • Atlassian Opsgenie Integration
    • Splunk On-Call Integration
    • Pushover Integration
    • Pushbullet Integration
    • Gotify Integration
    • Ntfy Integration
    • Spike.sh Integration
    • PagerDuty Integration
    • Zapier Integration
    • AlertOps Integration
  • Status Page

    • Status page
  • 3rd Party Status Pages

    • Using 3rd party Status Pages
    • Atlassian Status Page Integration with Xitoring
    • Status.io Integration with Xitoring
    • Statuspal Integration with Xitoring
    • Instatus Integration with Xitoring
  • Dashboards

    • Main Dashboard
    • Custom Dashboards
  • Metrics

    • Metrics
  • MCP Server

    • Setup & Tool Reference

Spike.sh Integration

Xitoring supports Spike.sh using Webhooks to allow receiving alerts and notifications on your Spike.sh account. In order to configure this integration, you need to follow these steps.

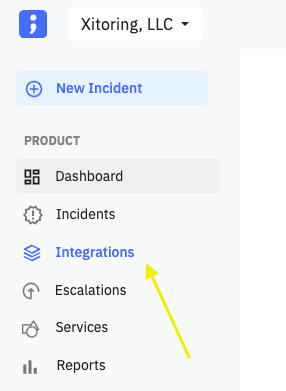
  1. Navigate to the Integrations page. Spike.sh integration

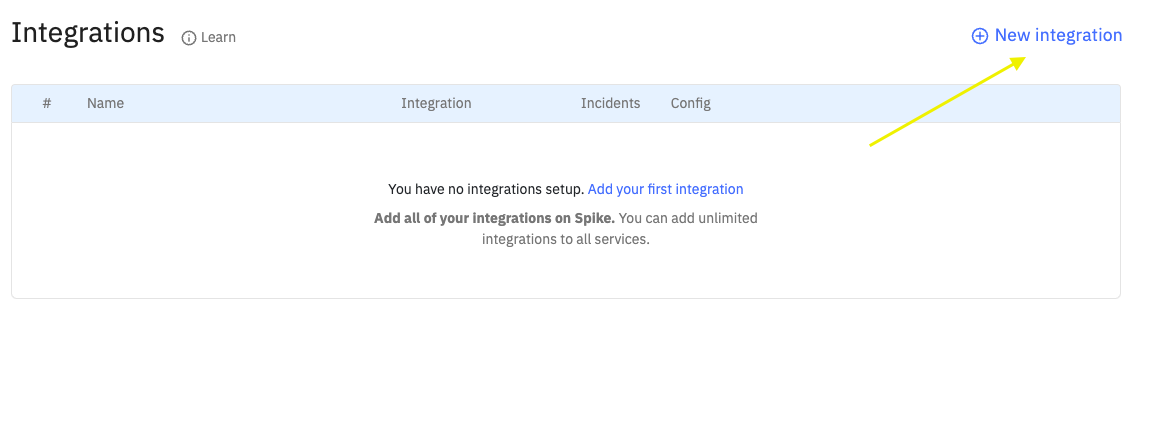
  2. Now click on New Integration button. Spike.sh integration
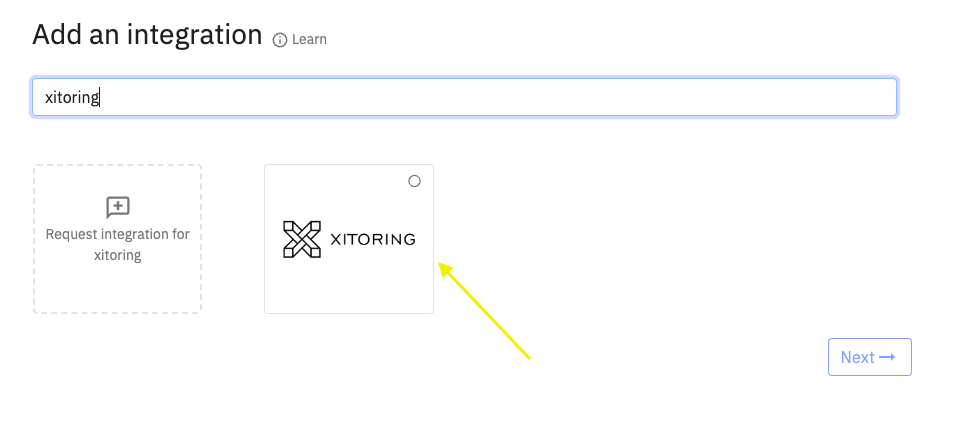
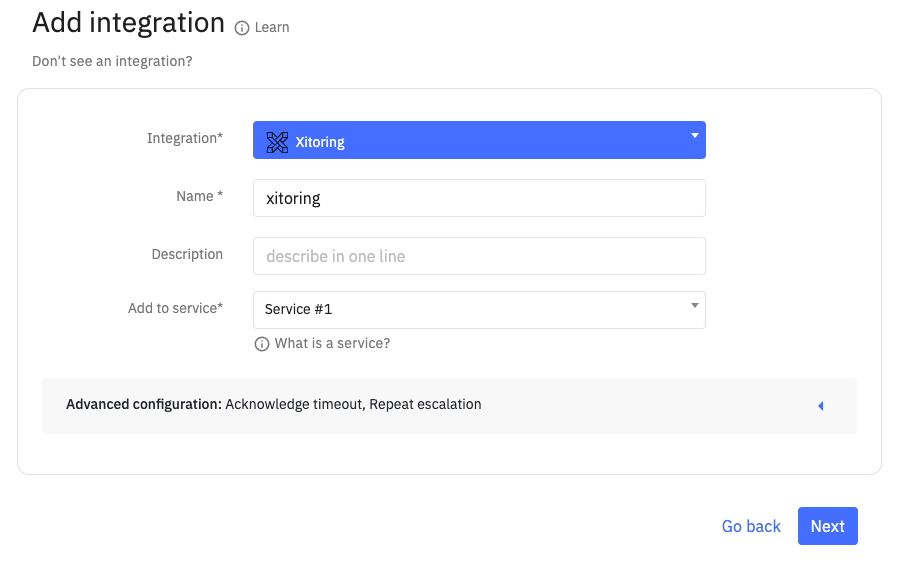
  3. Search for Xitoring in the integration list, select it, and then click on the Next button. Spike.sh integration
  4. Choose a name for this integration (e.g. Xitoring), and choose the Service using Add to Service select box Spike.sh integration
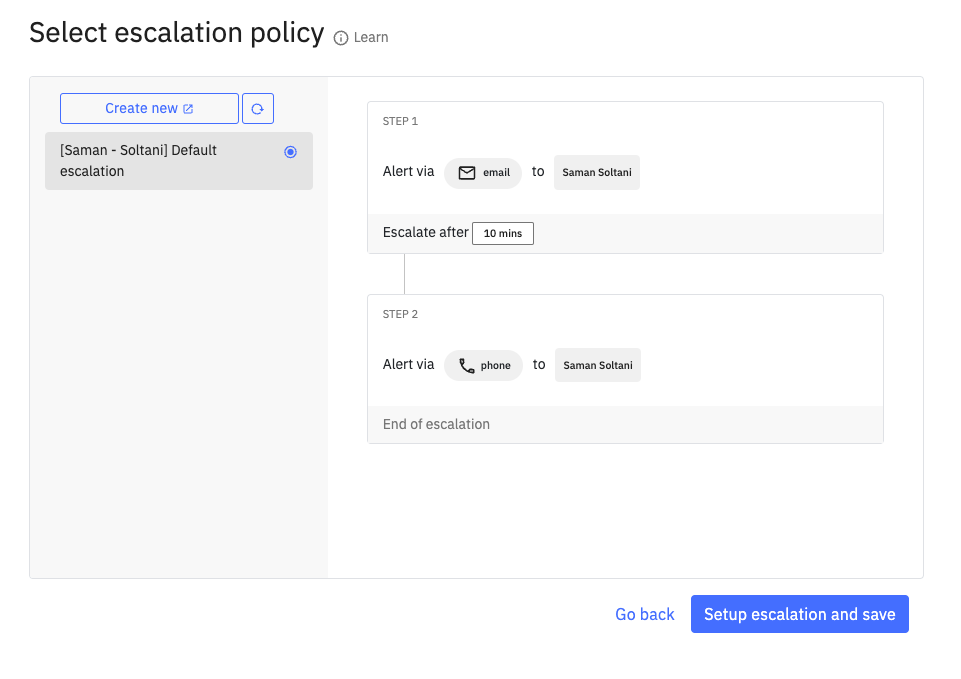
  5. Review your escalation policy, and then click on Setup escalation and save. Spike.sh integration
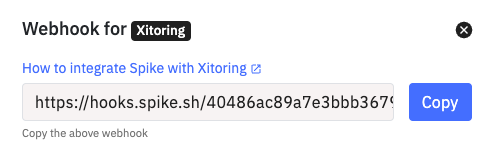
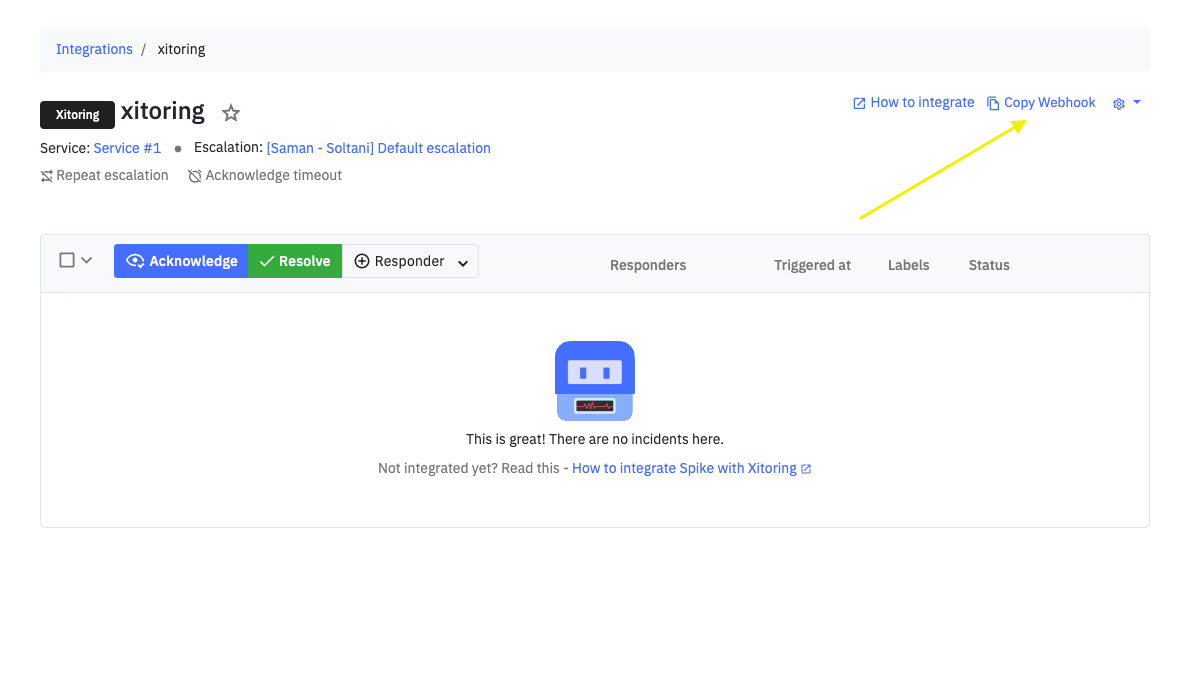
  6. Now your integration is setup successfully, Click on Copy Webhook to copy the generated Webhook. Spike.sh integration
Spike.sh integration

Enable Spike.sh Integration on Xitoring

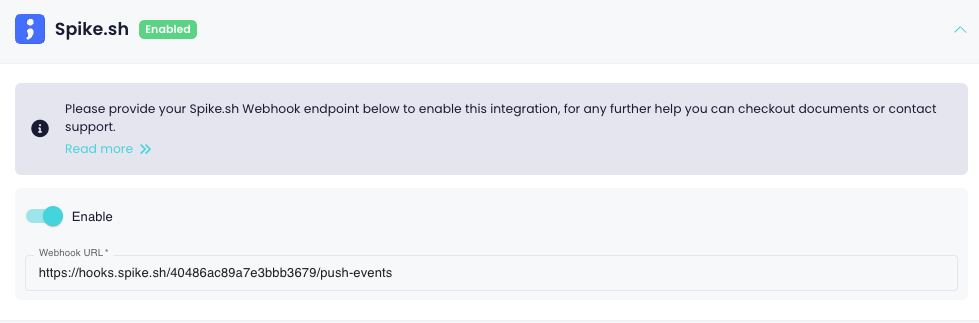
To enable Spike.sh integration please navigate to Notification Roles and select your desired notification role, enable Spike.sh and provide the generated Webhook endpoint generated in the last section as shown in the below image.
Spike.sh integration

It's recommended to use Send a test notification to make sure the integration is working properly. For any questions or concerns you can contact support@xitoring.com

Last Updated: 8/17/23, 8:52 AM
Prev
Ntfy Integration
Next
PagerDuty Integration